Introduction
With the introduction of the Inventory Engine into the Corgi Engine in v4.0, the engine now supports the creation, collection and use of keys. Keys are inventory items that, combined with a few components on your scene elements, will allow you to interact with doors, open chests, loot their contents, and generally activate stuff in your scenes. If you want examples in action, you can check the FeaturesKeys demo scene, located in Demos/Minimal, it’ll provide working examples of key activated doors and chests.
Creating a key
If you’re familiar with the Inventory Engine, this will be easy. If not, you should probably check out its documentation. To create a key, simply right click in one of your Resources folder, then go Create > More Mountains > Corgi Engine > InventoryEngineKey. Give this newly created scriptable object instance a name, and you’re ready to fill its details in its inspector.
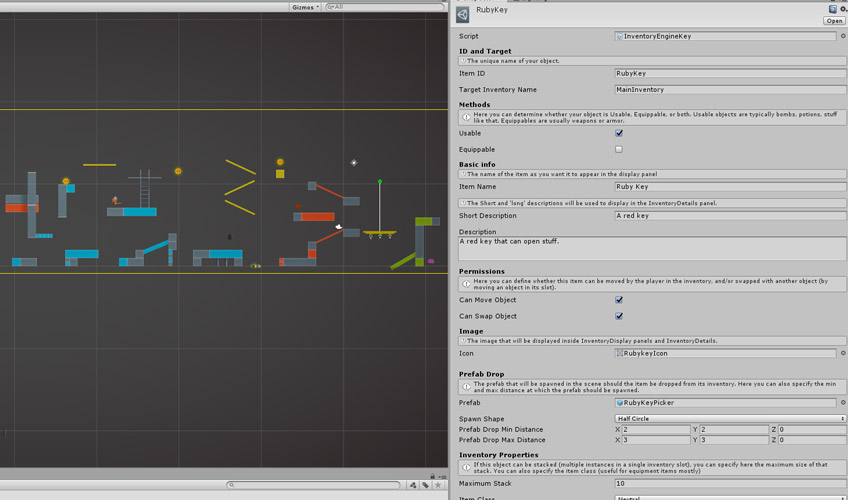
The key’s inspector is the same as any Base Item you can create in the Inventory Engine, so we won’t go over the details again here, but note that the Key’s name (ItemID) is really important, as it’s the string you’ll use to say what key can open what door/chest/etc, so it needs to be unique.
Once you’ve created that scriptable object instance, all that’s left to do is to create a pickable item for it. If you don’t remember how that’s done, check out this documentation.
Creating a door
One of the most common things you can open with a key is a door. So let’s start with that. The most simple way to create an openable door in the Corgi Engine is to reuse the Moving Platform component. We won’t go again over the details of creating a moving platform, it’s exactly the same process here. The only notable things are that you’ll probably want to set its Cycle Option to OnlyOnce, and its ScriptActivated field to True. The rest is up to you.
Now we need to add a Key Operated Zone to it.
Key Operated Zones
Once you’ve got your moving door/platform, you need a zone to interact with the key and open it. For that, create an empty game object, add a Box Collider 2D to it, set it to IsTrigger, resize it to your liking and position it somewhere between your key picker item and your door. Then, add a KeyOperatedZone component to it.
KeyOperatedZones are an extension of the ButtonActivated class, which means they’ll combine the advantages and options of ButtonActivated elements (dialogue zones for example) and add key support to them.
From your zone’s inspector, you can set, among other things, whether the zone is auto activated or not (in this case it’ll require you to press a button). You can also specify a number of activations, and a delay between each use. If your zone is not auto activated, you can decide to have a button prompt show up always or only when when colliding, and where it should appear. Finally, you can decide that this zone requires a key, and in that case what KeyID the zone should look for in your character’s inventory.
The last thing to do is to bind an action to this zone. This action is a method on any object in your scene that will be triggered when the zone is activated (when you enter it and have met the conditions you just defined to activate it : button pressed, key in inventory, etc). In our door example, just drag your door into the action field, and select the MovingPlatform.AuthorizeMovement method. That’s it!
With this simple component, you can control doors, but really any object with a public method bindable to this Key Action field. You can have doors that open when you approach, or when you press a button, or that won’t open without a key, etc.
Creating a chest
Creating a chest is just as simple as creating a door. Created a Key Operated Zone just like before, and then drop a sprite or 3D model into your scene for your chest. On that chest object, add an InventoryEngineChest component. Then all you have to do is add ItemPicker components to it (one per item you want in your chest). Then bind your Chest to your KeyOperatedZone’s inspector just like before, using the InventoryEngineChest.OpenChest method this time. You’re done! When activated, the InventoryEngineChest component will automatically pick all the ItemPickers you’ve added to it and put their items into your character’s inventory. Additionnally, you can add an animator to it to trigger an open animation. Your animator will then need a trigger Animation Parameter called “OpenChest”.