Introduction

“Agents” in the CorgiEngine is a term used to describe any kind of characters, whether they’re playable characters, or enemies, NPCs, etc. There are a few core classes that make these agents work, and that you’ll need to get familiar with if you want to expand and create more character abilities for example.
In the meantime, this page aims at presenting the basic concepts and allowing you to quickly create your own character (player controlled or AI based). Note that all the information on this page (and on that whole documentation for that matter) only works for Corgi Engine v3.0 or more.
Creating a simple playable character and setting it in a scene
Creating a simple character :
- in Unity 6000.5.0f1 (or higher), create a new project and import Corgi Engine v10.0 via the Package Manager
- open the MinimalLevel demo scene
- create an empty game object, position it at -10,-3,0, name it MyTestCharacter
- create a new empty child game object to the MyTestCharacter node, add a SpriteRenderer to it, set its Sprite to Adventurer_0, name it MyModel
- on the MyTestCharacter node, add a Character component, press the AutoBuildPlayerCharacter button at the bottom of it
- drag your MyModel into the Character’s inspector’s CharacterModel field
- edit the BoxCollider2D’s size to 0.8,0.8
Setting it as the playable character in our scene :
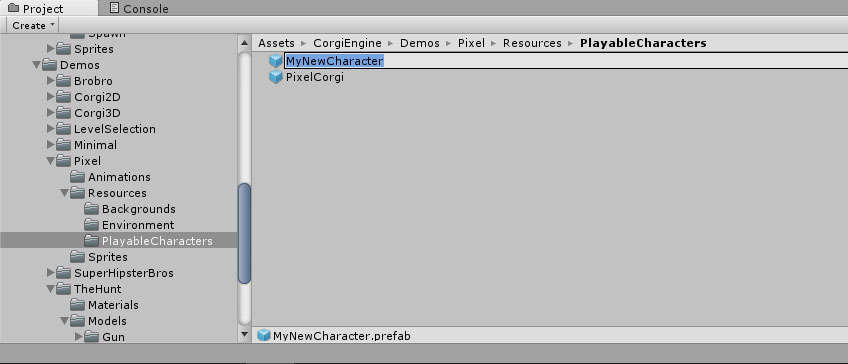
- drag the MyTestCharacter node into your project to make it a prefab, then remove it from the scene
- select the LevelManager, and drag your newly created prefab into its PlayerPrefabs[0] slot
- press play, enjoy your newly created character
- make sure you read the rest of the documentation to learn more about how to create more complex characters
Base concepts
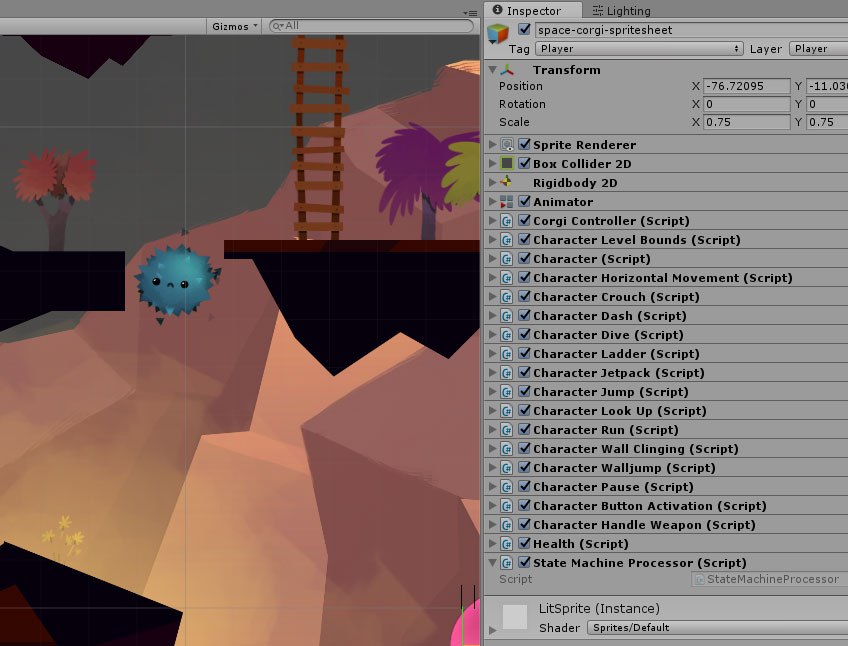
This page goes into more details about the mandatory components of a Character, but here’s a brief rundown. An agent in the Corgi Engine usually has these components :
- Transform : the base block of every game object in Unity. Make sure your character’s transform scale is normalized at 1,1,1. If you need to make a bigger or smaller character, always adjust the model’s scale, not the base transform.
- BoxCollider2D : the collider whose size is used to determine collisions and where in the world the agent is. You’ll want to make sure this is as centered vertically as possible on the model, and that the x offset is 0.
- RigidBody2D : only used to provide basic interactions with standard physics (completely optional)
- CorgiController : responsible for collision detection, basic movement (move left / right), gravity, the CorgiController is basically the replacement for Unity’s standard physics. It provides tighter movement and feel. Obviously, and by design, this is not a physics engine.
- Character : This is the central class that will link all the others. It doesn’t do much in itself, but really acts as a central point. That’s where you define if the player is an AI or player-controlled, how it should flip, if it’s model based, stuff like that. It’s also the class that will control all character abilities at runtime.
- Health : Not mandatory, but in most games your agents will be able to die. The Health component handles damage, health gain/loss, and eventually death.
- Character Abilities : So far all the previous components offer lots of possibilities, but don’t really “do” anything visible. That’s what Character Abilities are for. The asset comes packed with more than 15 abilities, from simple ones like HorizontalMovement to more complex ones like weapon handling. They’re all optional, and you can pick whichever you want. You can of course also easily create your own abilities to build your very own game.
- Renderer : you’ll very likely want some form of visual representation for your character (a sprite, a 3D model, etc). Make sure you separate logic and visuals by applying a proper hierarchy.
If you follow the steps above, you’ll quickly have a character to play with!
How do I create an Agent ?
There are many ways you can create a playable or AI character in the Corgi Engine. Here we’ll cover** the 3 recommended ones**. Note that if you prefer doing differently, as long as it works for you, it’s all fine.
Automatic Creation
Introduced in Corgi Engine v3.0, the “Autobuild Character” feature allows you to create a new character in a few seconds. Note that after that initial setup you’ll still have to setup animations and all that, but it’s a lot faster than it used to be :)
Here’s how to proceed :
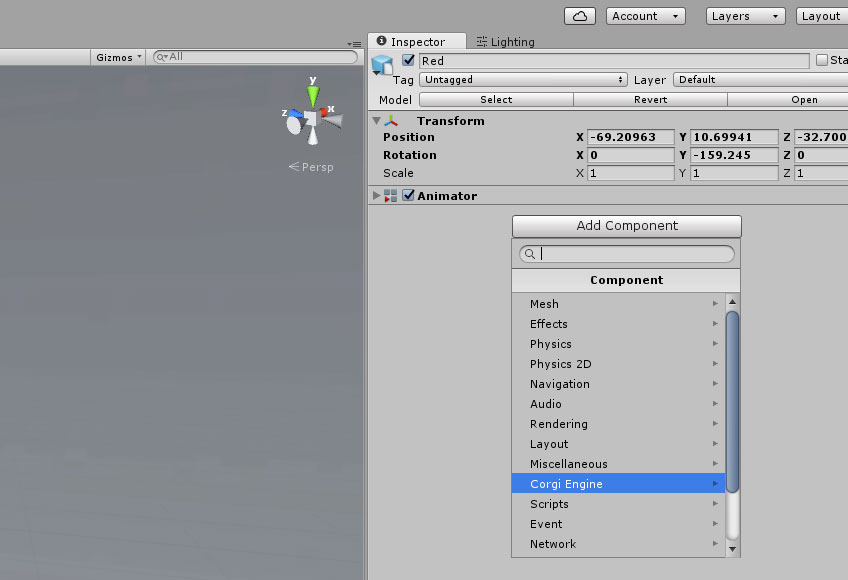
- In a scene that meets the minimal requirements, put a GameObject.
- You’ll need a GameObject to start with. You can create an empty one, take an existing prefab, drag a Sprite on the scene, or a model, it’s up to you.
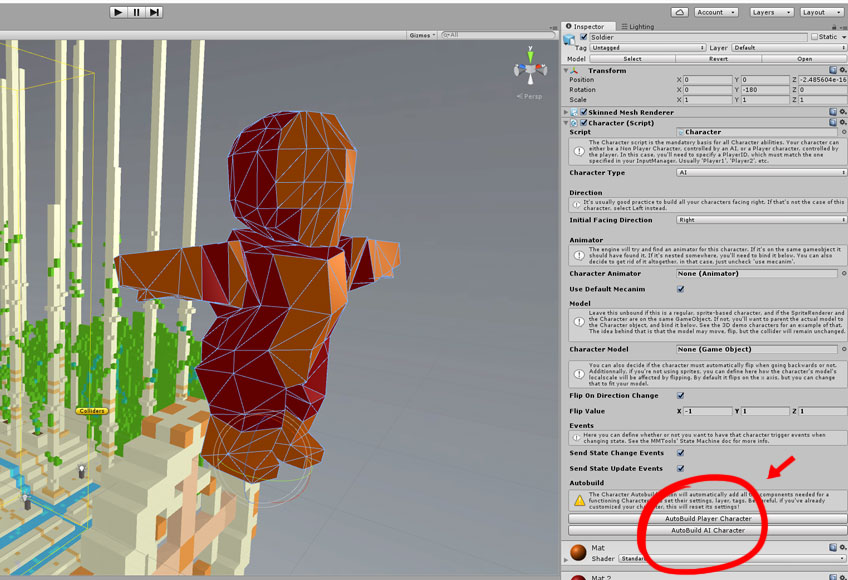
- Add a Character component to that GameObject
- At the bottom of the Character’s inspector, press either “Autobuild Player Character” or “Autobuild AI Character”, depending on what kind of character you’re after.
-
Press play. If you went for an AI character, it should be walking around the scene. If it’s a player character, try moving around. You’ve created a Character!

- You can now fine tune the various settings, remove the abilities you’re not interested in for this character, add animations, etc. Or you can leave it like that and start prototyping the rest of your game and levels.
Copy
Another fast way to create an agent is to find one you like in the demos, and create yours from that. The process for that is quite simple :
- Find an agent you like in one of the demos.
- Locate its prefab (select the Agent in Scene View, and in its inspector, at the very top right under the prefab’s name and tag there’s a Select button)
- Duplicate the prefab (cmd + D)
- Rename it to whatever you want your Character to be called
- Make the changes you want. Maybe you’ll just want to replace some settings, maybe you’ll want to change the sprite and animations. It’s up to you from there.
Components approach
You can also create a Character from scratch. It’s longer but why not?
- Start with an empty gameobject. Ideally you’ll want to separate the Character part from the visual part. The best possible hierarchy has the CorgiController/BoxCollider2D/Character/Abilities on the top level, and then nests the visual parts (sprite, model, etc).
- At the top of the inspector, set the tag to Player if it’s a player character, or to anything you prefer if it’s not. Same thing for the layer.
- On your top level object, add a BoxCollider2D. Adjust its size to match your sprite/model dimensions.
- Add a CorgiController component. Set the various settings (see the class documentation if you need help with that), and make sure to set the various collision masks (platforms, one ways, etc)
- Add a Character component. Check the various settings to make sure they’re ok with you.
- Add the Character Abilities you want (it’s best to use the AddComponent button at the bottom of the inspector for that, and navigate there)
- Optionnally, add a RigidBody2D, a Health component, a HealthBar component, etc.