Hierarchy and renderer
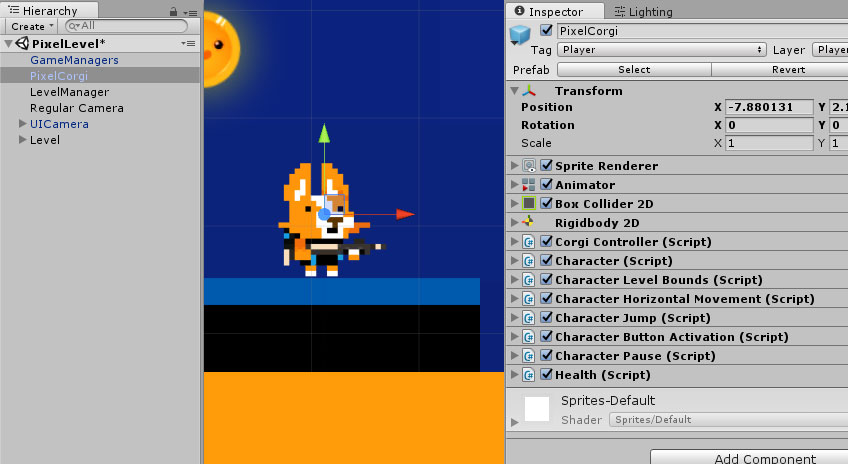
There are different ways you can choose to assemble your character. The first, and most simple way is to have everything on the same level. Unless you are dealing with an extremely simple character, and ensure your Animator won’t interfere with your Transform, this is usually not the best option:
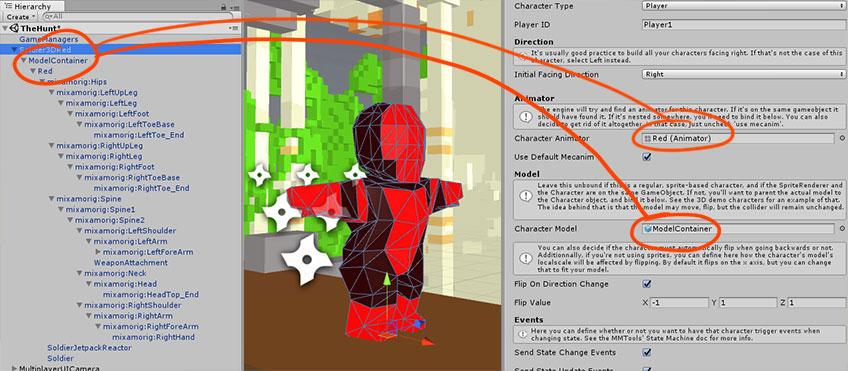
A better way to do things is to separate visuals and logic. In most cases, unless you’re working with only a simple sprite, it’s best to have a nested hierarchy. A nested hierarchy will give you more control overall over things like squash and stretch, weapon attachments, rotating/flipping sub components, and will provide a better separation of logic and model. The engine can handle both setups, without any impact on performance or behaviour. If you decide to go for the nested way, make sure you set the Animator and Model in the top level’s Character’s inspector.
The system can work with any kind of character. It can be 2D, 3D, it’s up to you, really. The asset includes examples of classic, sprite based characters, Spine powered ones, and 3D models.
Collider and RigidBody
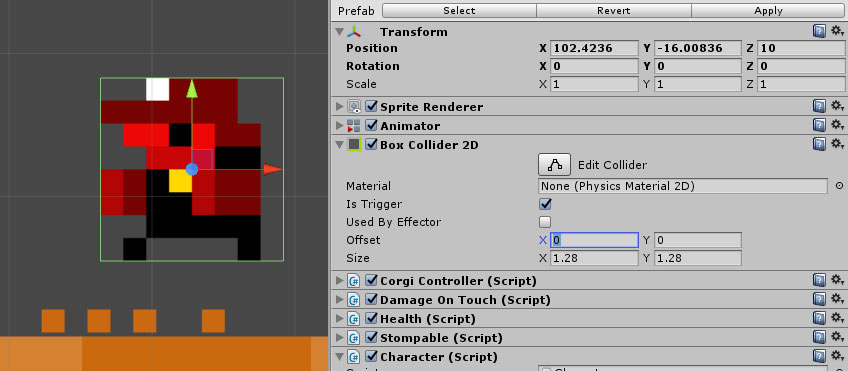
For the Corgi Controller to work, your character needs to have a BoxCollider2D component on it (even if it’s a 3D model). No material, IsTrigger set to true, the size that matches the parts of your character you don’t want to go through walls (possibly your whole sprite size, but not necessarily), and an x offset set to zero.
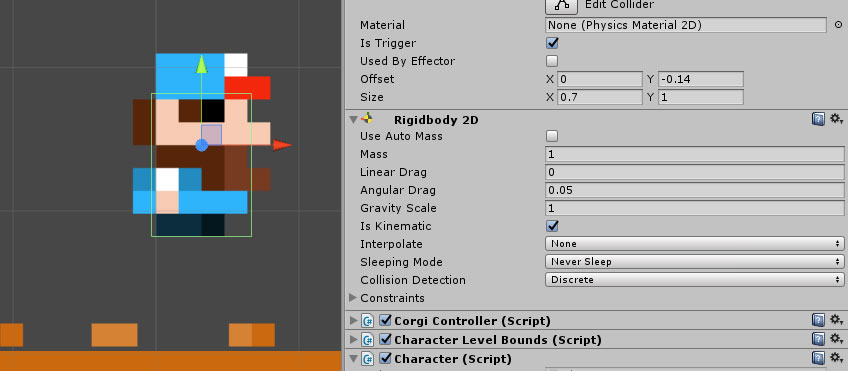
Additionnally, if you want to use the (experimental) basic physics interactions between the Corgi Controller and regular Unity physics, you can add a RigidBody2D to it. In this case, these settings should have you set up :
Corgi Controller
The Corgi Engine was created as an alternative to physics based platformers, aiming to provide a tighter gameplay, faster, and more predictable than physics. To do so, the engine implements its own “physics” : collision detection, movement, etc. Note that this is absolutely not a physics engine, this is not compatible with regular Unity physics, and if you’re planning on recreating Angry Birds, this will not do the trick.
The Corgi Controller is at the heart of this system. It’s the basis for each character. Its main function is to handle collisions, gravity and air behaviour, and basic movement. You’ll be able to add or set forces to it, usually via Character Abilities, which will make it move.
To handle collisions, the Corgi Controller uses raycasts, which you can see in the scene view when playing your game. Basically how it works is that the controller is casting small rays all around itself, like tiny lasers. If a horizontal laser hits something, then we’ve probably hit a wall, or a slope. Note that you can define the maximum degree of a slope to prevent your character from walking on too angled surfaces, within a 0 - 45° range, anything above 45° will always be considered a wall. If a vertical ray hits something, we’ve hit the ground or the ceiling. Depending on the forces being applied every single frame, and based on whether or not the raycasts hit something or not, the controller will move the object around the scene, or make it stop to prevent it from entering a wall for example.
Being at the center of your character, the Corgi Controller’s inspector settings are quite important. There you’ll be able to define the gravity, various speed factors, what slopes the character can climb (and at what speed).
You’ll also need to define Collision Masks. The Corgi Controller can interact with different types of platforms :
- regular platforms (Platforms)
- moving platforms
- one way platforms (platforms you can jump on from underneath)
- one way moving platforms
By default, the engine comes configured with a number of layers, and there’s one for each of these platforms : Plaforms, MovingPlatforms, OneWayPlatforms, MovingOneWayPlatforms respectively. If you add more layers, or change these, make sure to replicate these changes on your characters.
From the inspector you can also customize the raycasts. Their number really depends on the size of your character. What you’ll want to achieve is as few raycasts as possible (for performance reasons, even though raycasts are not really an issue these days), but with raycasts close enough to each other that no platform/enemy/whatever could fit between two raycasts (and in this case wouldn’t be detected by the engine). If you ever have your character jump in the air for “no reason”, it’s probably because something managed to fit between two raycasts. In that case you’ll want to either increase the amount of raycasts, or more likely just fix that at the design level by editing your scene and props.
The controller also lets you define a number of settings related to slopes. In the Stickiness section, you’ll be able to define whether you want to force your character to stick to slopes. You can see an example of this in context in the RetroMountains demo scene, which contains, in its upper section, some extreme examples of the slopes the engine can handle.
The engine comes packed with examples you can look at for differerent Corgi Controller setups. You can of course diverge from these, in which case you will likely have to adapt your Corgi Controller’s values. So make sure to adapt the various raycast lengths and settings to make sure they still make sense in your specific context.
Character Level Bounds
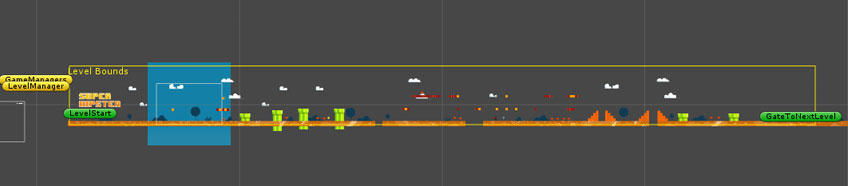
Every level has level bounds, defined on the LevelManager. It’s the invisible line to the left/top/right/bottom (actually visible in the scene view, it’s that yellow box with “Level Bounds” written in the top left corner) that defines where the camera will stop. Using this component, you can decide what happens to your character when it meets these bounds (usually either nothing, constrain or death).
Character
This is the central class that will link all the others. It doesn’t do much in itself, but really acts as a central point. That’s where you define if the player is an AI or player-controlled, how it should flip, if it’s model based, stuff like that. It’s also the class that will control all Character Abilities at runtime.
It’s a very central class, at the core of the v3.0 update. From its inspector you’ll be able to define a few things. If it’s a player character, the PlayerID field is very important. It has to match exactly the one in your InputManager (that’s how the InputManager knows what characters to control). Then there’s basic setup stuff, like what direction your sprite/mesh is facing initially. You can also specify an animator, if your animator isn’t on the top level of your hierarchy. Same thing for the Model (which can be 2D or 3D or whatever you prefer).
Health
The Health component handles damage, health gain/loss, and eventually death (and rebirth). It’s mandatory if your character can take damage. Its various methods will allow you to remove / add health points from the initial health value, it’ll handle damage and the associated effects (visual and in terms of collisions etc).
Character Abilities
The last (but not least important) part of your character will be the Character Abilities. The asset comes packed with more than 15 abilities, from simple ones like HorizontalMovement to more complex ones like weapon handling. They’re all optional, and you can pick whichever you want. You can of course also easily create your own abilities to build your very own game. You can check this page for more details about Character Abilities.