Introduction
Feedback in games is super important. Whether it’s visual feedback, haptic vibrations, sound, or anything else, feedback is the sum of things that happen whenever something happens, in general or in reaction to the player’s input. This will ensure the player always understands the consequences of their actions. The Corgi Engine is built with that in mind at all levels, and comes with a lot of classes and prefabs you can use to improve the general feeling of your game. This page highlights a few examples of that.
Most, if not all, screenshakes, visual effects, particles, post processing bumps, sounds go through the MMF Player system. When looking for effects in the demos that don’t affect character position or core gameplay like that, big chances are they’ll be tweakable from a feedback, as a general rule.
MMFeedback
The engine comes with the powerful MMFeedback system, that will allow you to play “feedbacks” with a simple one liner.
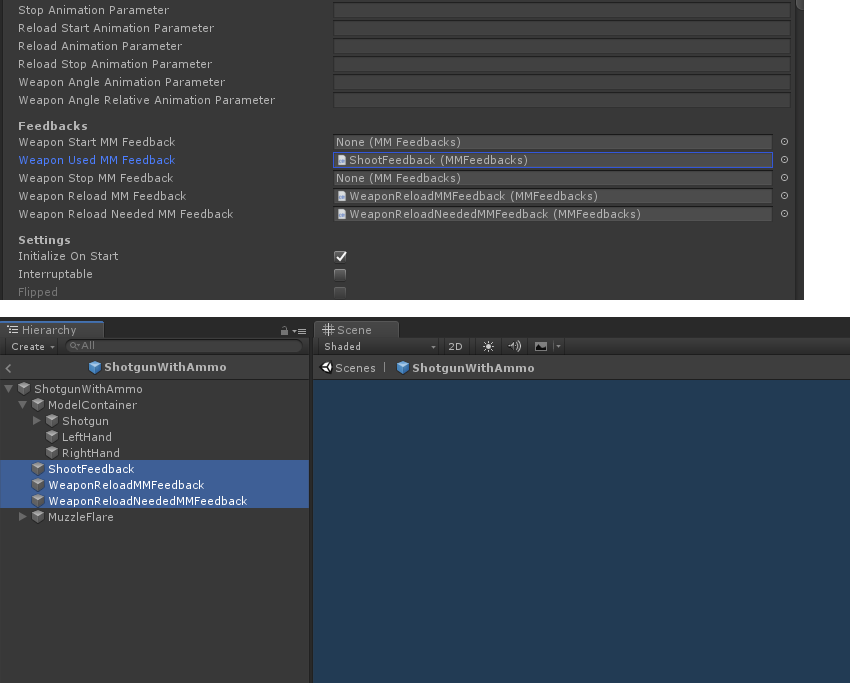
Many classes use it : weapons, health, abilities, and more. To use it, all you need to do is create a new empty object, add a MMF Player component to it, and drag it into the weapon’s or ability’s slot. Then, in the MMF Player’s inspector, you’ll need to add the feedbacks you want from the feedbacks list, and tweak them individually. Once you’re done, you can press play to test your ability (or weapon, or whatever you’re triggering that feedback with). You can also, on play mode, use the test buttons to test how your feedbacks behave.
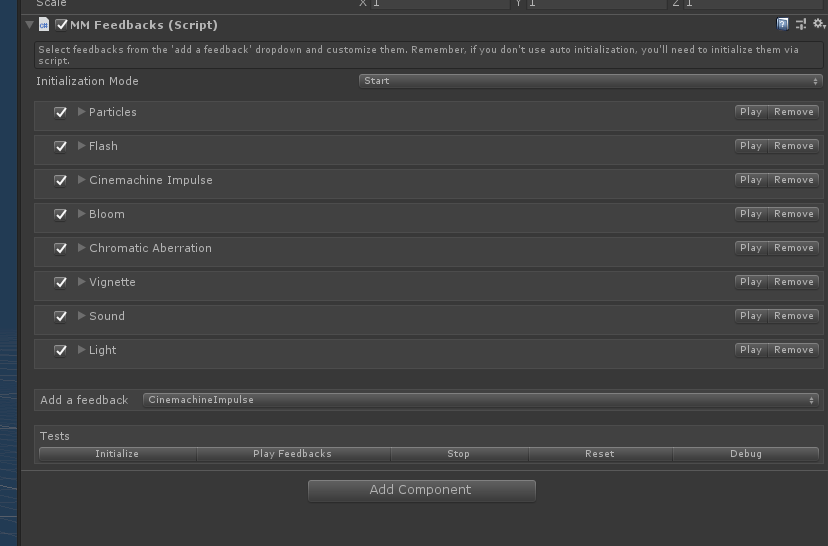
The MMF Player class exposes a bunch of methods, notably PlayFeedbacks(). This class will allow you to trigger many feedbacks at once, using only one line. To take advantage of the MMF Player system in your own classes, all you have to do is declare a public MMF Player (the S is important) in your class or ability, and then use its PlayFeedbacks() and StopFeedbacks() methods to trigger it, anywhere you want. It will automatically add the panel above to your class’ inspector, from which you’ll be able to add, remove and customize feedbacks.
To learn more about MMF Player, you can go check its documentation over on the Feel’s documentation website
Screen shake
Probably my personal favorite, screen shake will add a lot of impact to your game, and will help sell the power of a weapon or the force of a jump. In the engine, you’ll be able to use sreen shakes directly from certain components, such as Weapons, where you’ll be able to automatically associate a screen shake to the Weapon’s use, or via code directly. To do so, all you’ll have to do is call the CameraController’s Shake method, passing it ShakeParameters (duration, intensity and frequency). You can look at the CharacterDive ability class for an example of how it’s done. Alternatively, you can use the MMTools’ ScreenShakeEvents and add an MMCameraShaker component to your camera to grab this event and shake your camera for you.
Damage floaties
When applying damage, you may want to show how much damage was done. While the Feedbacks system already offers a system to do so, the Corgi Engine includes a dedicated feedback you can use that will ease the process of passing damage info to the floating text spawner : the MMFeedbackCorgiEngineFloatingText. This feedback lets you trigger the appearance of a floating text, that will reflect the damage done to the target Health component. This requires that a MMFloatingTextSpawner be correctly setup in the scene, otherwise nothing will happen. To do so, create a new empty object, add a MMFloatingTextSpawner to it. Drag (at least) one MMFloatingText prefab into its PooledSimpleMMFloatingText slot. You’ll find such prefabs already made in the MMTools/Tools/MMFloatingText/Prefabs folder, but feel free to create your own. You can see it in action on most enemies in the RetroAI demo scene.
Screen flash
Flashing the screen is also a great way to sell the action in your game. Whether you’re flashing it to white or yellow when shooting, or to red when getting hit, it’ll help the Player understand what’s happening on screen. The engine comes with the MMFlash class, an example of which you’ll find in all UICameras, that allows you to flash the screen using an MMFlashEvent in a single line of code, like so :
MMFlashEvent.Trigger(Color.white);
Time Management
Stopping, accelerating or slowing down the flow of time will allow you to highlight certain actions in your game. Maybe you’ll want to add freeze frames on hit, like in Street Fighter games, or you’ll want to slow down the action smoothly when a boss dies. All that can be done super easily in the Corgi Engine, thanks to the MMTimeManager class. You’ll need to add that to an empty object in your scene, and from there you’ll be able to manipulate time using simple, one liner events.
For example, this is how you trigger a freeze frame :
MMFreezeFrameEvent.Trigger(FreezeFramesOnHitDuration);
And this is how you slow down time for 3s, dividing the current time speed by half :
MMTimeScaleEvent.Trigger(MMTimeScaleMethods.For, 0.5f, 3f, true, 1f, false);
The MMTimeManager class comes with many more options, so don’t hesitate to check its documentation (or look at its code) for more details. The important thing to know is that it works as a stack, so you can slow down time, then slow it down more, then pause, unpause, freeze a frame, and all that will work together nicely as long as you only modify the time using it, and not via the native timescale API.
Health Bars
Feedback can be very obvious, such as a screen shake, but it can also be more subtle. Having nice health bars that flash and animate is a nice way to communicate a change in health on a character in a very clear way. The engine comes with the MMHealthBar component, a very powerful way to create nice looking health bars. To use it, just put it on a Character with a Health component. From its inspector, you’ll be able to define its colors, animation speed, delays, bump animation, and more. You can decide to have the engine draw it for you, or you can create your own visuals and use them.
Animations, explosions, knockback, particles
Again, feedback is one of the pillars of the engine, so pretty much every component will provide you with options to make things feel better. Whether it’s setting up animations, adding visual or sound effects when things happen (death, hit…), adding knockback to weapons, particle effects when touching the ground, or adding spread to your projectiles, I’d recommend you use these to push your game to the next level.